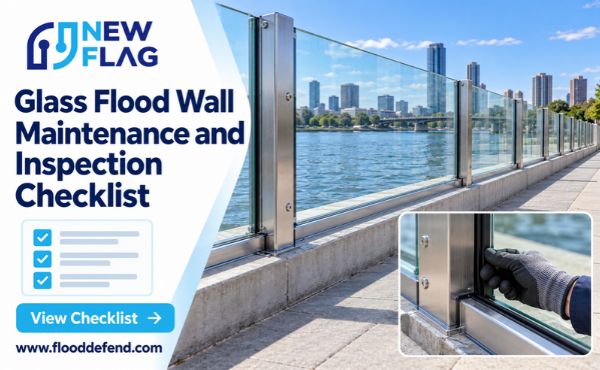

A glass flood wall protects property only when every component works together. Skipped maintenance invites sealant failure, glass damage, and frame corrosion. Each problem weakens the barrier long before a flood arrives.
A practical inspection routine follows three tiers. Daily and weekly visual checks catch cracks, debris, and water pooling early. Monthly inspections examine seals, gaskets, and hardware tightness. Annual professional reviews confirm structural integrity and regulatory compliance.
Component care matters too. Glass panels, seals, frames, and drainage systems each need specific attention. Document every finding with a date and signature for audit records.
The sections below explain each inspection tier and maintenance task in detail.
Glass Flood Wall Inspection Schedule
A tiered schedule matches effort to risk. Daily and weekly visual checks catch surface issues early, while they are still cheap to fix. Monthly inspections go deeper into seals and hardware, where slow wear hides. Annual professional inspections are required for structural and compliance assurance. Each tier builds on the one below it.
Daily and Weekly Checks
Daily quick checks take only a few minutes. Walk the length of the wall and look for visible cracks, chips, or scratches in the panels. Remove debris that traps moisture against the glass or frame. Watch for water pooling at the base, which signals a drainage problem. Note any new cloudiness or discoloration in the glass.
Weekly walkthroughs add detail. Run a finger along the sealant edges and feel for gaps, lifting, or soft spots. Check frame fasteners for looseness or rust streaks. Confirm that drainage outlets are clear and flowing. Look at the anchor points for movement or cracking in the surrounding concrete. Log every finding with the date and your initials.
Monthly Inspections
Monthly inspections examine the parts that daily checks cannot reach. Test gasket compression by pressing along the seal line and confirming a firm, even rebound. Check hardware tightness with a torque wrench and compare readings against the manufacturer’s specification. Inspect panel alignment and look for any shift in the frame. Update the maintenance log with each measurement.
Records deserve the same care as the hardware. Date and sign every inspection sheet. Retain the records for compliance audits, since regulators may ask for a maintenance history. A complete log also shows wear trends over time. That history helps you plan repairs before a small fault becomes a flood risk.
Annual Professional Checks
Structural and Glass Integrity
A certified inspector brings tools and training that in-house staff lack. The annual visit looks for glass stress marks near edges and anchor points. These faint patterns can signal load concentration before a crack appears. The inspector also checks frame alignment against the original installation drawings. Any twist or settlement in the frame changes how panels seat under pressure.
Anchor condition receives close attention. Inspectors probe the surrounding concrete for cracks, spalling, or movement. Loose anchors reduce the wall’s ability to resist hydrostatic load. Seal performance is tested under load, often with a controlled water test. The inspector watches for weeping at joints and records the results. Findings are ranked by severity, and urgent defects are flagged for repair before the next flood season.
Compliance Review
The annual visit also confirms regulatory standing. Local flood protection rules change over time, and a system that passed inspection years ago may no longer meet current requirements. The inspector compares the installed Glass Flood Wall against the latest local code and the original design certification. Gaps are documented in plain language.
Certification records are then updated. The inspector signs a report that lists the inspection date, test results, and any required repairs. Property owners should file this report with their insurance and permitting documents. A current certificate demonstrates due diligence and supports claims after a flood event. Missing records can complicate both insurance reviews and permit renewals.

Glass Flood Wall Component Maintenance
Glass Panels
Glass panels carry the visible load of the barrier. They also collect dirt, mineral film, and organic debris. Clean panels with fresh water and a mild, non-abrasive detergent. Apply the solution with a soft cloth or sponge. Rinse thoroughly and dry with a clean squeegee. Avoid abrasive pads, razor blades, and strong solvents. These tools scratch the surface and can cloud the glass over time.
Inspect each panel in good light during every cleaning cycle. Look for scratches, chips, and edge nicks. Pay close attention to the corners and the areas near anchor points. Damage in these zones concentrates stress and can spread under flood load. Photograph any defect and note its size and location on the maintenance log. Report significant chips or cracks to a qualified technician for repair or replacement. Small surface marks may only need monitoring. Deep damage needs prompt action.
Seals and Gaskets
Seals and gaskets keep water from passing the panel edges. They degrade slowly and often fail without warning. Watch for three signs during monthly inspections. Cracking appears as fine lines along the seal surface. Hardening shows up as a loss of flexibility when you press the material. Separation appears as a visible gap between the seal and the glass or frame. Any of these signs calls for attention before the next flood season.
Re-sealing follows a clear sequence. First, remove loose or failed sealant with a plastic scraper. Second, clean the joint with a compatible solvent and let it dry fully. Third, apply new sealant in a continuous bead and tool it smooth. Fourth, allow the sealant to cure for the period stated on the product label. Finally, record the date and the product used in the maintenance log.
Replacement often makes more sense than repair. A gasket that has hardened across most of its length will not seal reliably after a patch. The same holds for seals that show separation at multiple joints. Replace the full run in these cases. Partial repairs on a Glass Flood Wall leave weak points that water will find. A complete replacement restores a uniform seal line and gives the next inspection a clean baseline.
Frame and Drainage Care
Corrosion and Fasteners
The frame holds every panel in line, so corrosion control protects the whole barrier. Inspect the frame surface during monthly checks. Look for rust streaks, blistering paint, and white powder on metal edges. Clean away salt, dirt, and standing moisture with fresh water. Touch up damaged coatings with a product approved for the frame material. Pay extra attention to the base plates and the zones where water collects. A small patch of corrosion spreads quickly once moisture reaches bare metal.
Fasteners need routine attention as well. Check bolt tightness with a torque wrench and compare each reading against the manufacturer’s specification. Tighten any fastener that falls below the stated value. Lubricate exposed threads with a corrosion-inhibiting product. Then confirm panel alignment by sighting along the frame line. A shifted frame changes how panels seat under load. Adjust shims or anchors as needed, and record every adjustment in the maintenance log.
Flow and Leak Testing
Drainage protects the Glass Flood Wall from water pressure at the base. Clear channels and outlets of leaves, silt, and debris during weekly walkthroughs. Confirm that each outlet drains freely and shows no standing water. Then run a flow test with a controlled water source. Watch how quickly water moves through the channel and note any slow spots. Slow drainage points to a partial blockage or a settled channel.
Leak testing follows the flow test. Direct water at the joints and watch for weeping at seals, frame connections, and anchor points. Mark each leak location and photograph it for the log. Small seeps often need only fresh sealant. Repeated leaks at the same joint may signal a deeper alignment problem. Schedule repairs before the next flood season, and retest after the work is complete.
Conclusion
Daily and weekly visual checks catch surface faults, monthly inspections test seals and hardware, and annual professional reviews confirm structural integrity and compliance. Four maintenance areas complete the picture: glass panels, seals and gaskets, frames, and drainage.
Documentation and prompt repairs keep a Glass Flood Wall flood-ready. Dated, signed records prove due diligence at audit time. Small defects fixed early never grow into flood risks.
Schedule the next professional inspection now, before the flood season arrives. A printable checklist and a certified maintenance provider make the routine easy to sustain.
FAQ
How often should a glass flood wall be inspected?
Visual checks belong on a daily or weekly schedule. Monthly inspections cover seals, gaskets, and hardware. A certified professional performs a full structural and compliance review once a year. Each tier catches different faults, so all three matter for a flood-ready barrier.
Can property staff handle maintenance without a professional?
Staff can manage daily visual checks, debris removal, panel cleaning, and drainage clearing. Seal replacement, anchor adjustment, and load testing call for trained technicians. The annual professional inspection remains essential for structural assurance and certification records.
When should seals be replaced instead of repaired?
Replace the full seal run when gaskets feel hard along most of their length or separate at multiple joints. A patch on widespread degradation leaves weak points. Localized cracking or a single lifted edge often responds well to re-sealing.
How long should inspection records be kept?
Retain dated, signed inspection sheets for as long as local flood protection regulations require. Regulators and insurers may request a maintenance history during audits or claims. A complete log also reveals wear trends that guide repair planning.
What should be checked after a flood event?
Inspect panels for new chips or cracks, then test seals and frame joints for weeping. Clear silt and debris from drainage channels. Photograph any damage and log it. Schedule professional repairs before the wall returns to service.