Verify the structural load rating first. Ask for the third-party certificate that proves it. This one number tells you whether the wall will hold back water at the stated depth, and no other feature matters if it fails.
Specifications drive safety, compliance, and long-term value. Picture two quotes: one lists a thinner glass rating, the other a heavier one for the same opening. The cheaper panel may not match your flood depth. Treat every glass flood wall specifications sheet as a checklist. Confirm each claim in writing before you compare prices.
Key Glass Flood Wall Specifications
The material and structural details form the foundation of every glass flood wall specifications sheet. Check these items first. They determine how the wall behaves under load, how long it lasts, and whether it meets your flood depth requirement.
Glass Type And Thickness
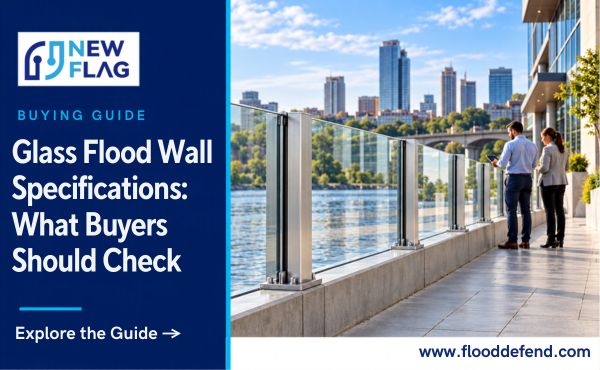
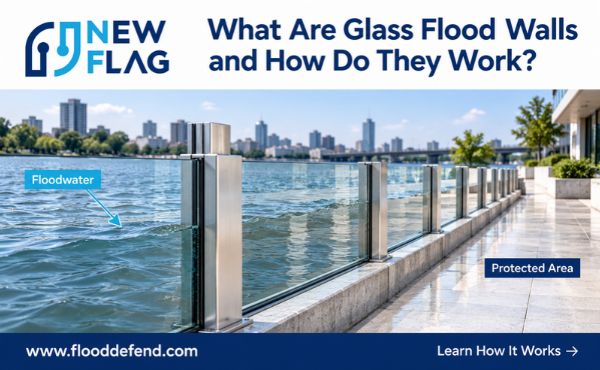
Glass flood walls, also called flood glazing, serve two roles at once. They provide practical flood defense and aesthetic design. A glass barrier keeps water out while preserving sightlines and daylight. Compare this with levees, which need significant horizontal space and block the view entirely.
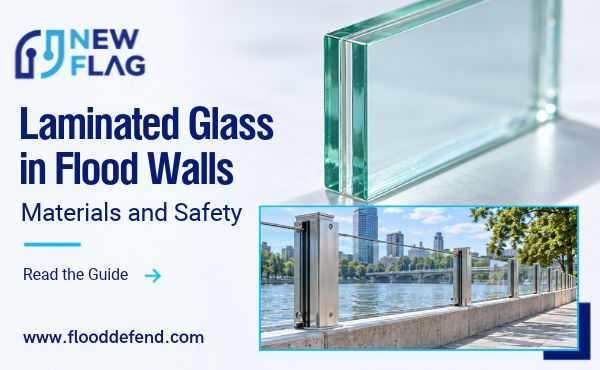
Start with the glass type. Flood glazing typically uses laminated glass. Two or more glass panes bond to a plastic interlayer. The interlayer holds the panes together if one breaks. This keeps the barrier watertight even after impact damage. Ask your supplier to confirm the lamination and the interlayer material in writing.
Thickness follows the load rating. A deeper flood depth and a wider unsupported span demand thicker glass. The thickness figure on the quote must match the certified structural load rating. A thin panel with a high rating claim deserves scrutiny. Request the test report that links the two numbers.
Frames, Anchors, And Seals
The frame carries the glass and transfers water pressure to the structure. Frame material matters for corrosion resistance. Floodwater, salt spray, and grit all attack metal over time. Ask which alloy or coating the supplier specifies and how it performs in wet, exposed conditions.
The anchoring system decides whether the wall stays put. Anchors must tie the frame into sound concrete or masonry. Loose or shallow anchors fail under hydrostatic load. Confirm the anchor type, spacing, and embedment depth against the certified design.
Seals complete the watertight assembly. Gaskets and sealants fill the joints between glass, frame, and structure. A well-designed seal flexes with the wall and resists UV exposure. Ask how the seals are specified and how they are replaced during service.
Water resistance rating ties these parts together. This rating states the water pressure the complete assembly holds without leakage. It belongs on the glass flood wall specifications sheet as a single verified figure. Treat the rating as the sum of glass, frame, anchors, and seals working as one system. A strong panel with a weak seal still leaks.
Performance Ratings To Confirm
Material details set the stage. Performance ratings prove the assembly works as a system. Confirm each rating below with a test report, not a brochure claim. A rating without a certificate is a marketing statement.
Watertightness And Hydrostatic Load
Watertightness states how much pressure the wall holds without a drop passing through. Hydrostatic load is the force standing water exerts on the glass and frame. The two ratings work together. A wall rated for a given depth must hold that depth with zero leakage for the stated test duration. Leakage at any joint fails the test. Read the rating as a system figure, not a glass-only figure.
Hydrostatic pressure rises in direct proportion to water depth. Double the depth and the load on every square meter doubles. Ask for the hydrostatic load rating at your specific flood depth, not a generic figure. A rating at a shallow depth tells you little about performance at a deeper one. The test report should name the depth, the duration, and the pass criteria. A certified report from an accredited laboratory carries more weight than an in-house test summary. Check that the tested assembly matches your design: same glass thickness, same frame profile, same anchor spacing.
Impact resistance covers debris. Floodwater carries branches, bins, and other floating objects. A laminated glass panel should resist a defined impact without losing watertightness. The interlayer holds the panes together after a strike. Confirm the impact energy the panel is rated to absorb. Wind load matters for exposed sites and for tall panels. Confirm both ratings on the glass flood wall specifications sheet, and confirm the test standard behind each one.
Height Limits And Durability
Standard protection heights reach up to 1.8 m (6 ft). That range covers most doorway and perimeter applications. Safety guidance recommends that floodwalls not exceed five feet. Above that height, the consequences of a failure grow and evacuation becomes harder. A taller wall also needs deeper anchors and a stronger frame, which raises cost and complexity. Treat five feet as a practical ceiling for most sites and confirm any taller design with a structural engineer.
Keep permanent flood barriers at or below five feet unless a certified engineer signs off on the taller design.
Durability decides long-term value. A well-designed barrier provides full-time permanent defense with no operational costs. No pumps to run, no staff to deploy, no gates to swing shut. The wall simply stands ready. Check the expected service life of the glass, frame coating, and seals. Ask how UV exposure and repeated wetting and drying cycles affect each component. Confirm the inspection interval the supplier recommends for seals, hardware, and frame condition.
Look for evidence of corrosion testing on the frame alloy. Ask whether the design accounts for ground movement and thermal expansion. Seals age faster than glass, so plan for replacement before the barrier’s design life ends. Keep spare seals and hardware on hand for repairs. Document each inspection in a log so trends in seal wear become visible. A wall that deforms under load loses its seal, and a lost seal means a leak.
Compliance And Certification Checks
Test Standards And Certificates
A performance rating means little without a standard behind it. Ask which test standard the supplier used for watertightness, hydrostatic load, impact, and wind load. The standard defines the test setup, the water depth, the duration, and the pass criteria. Two suppliers can quote the same depth rating from very different tests. Compare the standards, not just the numbers.
Certificates should come from an accredited laboratory. An in-house test summary is a starting point, not proof. Check that the certificate names the tested assembly: glass thickness, frame profile, and anchor spacing. A certificate for a different build tells you nothing about your wall. Confirm the certificate is current and matches the model quoted. Request copies in writing before you sign.
Documentation And Warranty Terms
The paperwork protects your investment long after installation. Ask for the full glass flood wall specifications sheet, the certified drawings, and the installation instructions. These documents should state the rated flood depth, the anchor layout, and the seal replacement interval. Keep them on file for inspections and future repairs.
Read the warranty terms closely. Confirm what the warranty covers: glass, frame coating, seals, and hardware may carry different periods. Check whether coverage depends on the recommended inspection schedule. A warranty that lapses without documented inspections offers limited value. Ask who performs repairs and how quickly spare seals and anchors ship. Clear terms now prevent disputes later, and a documented flood barrier is easier to insure and maintain.
Glass Flood Wall Specifications By Site
Site Data Buyers Must Supply
The best design depends on site exposure. How water reaches the property, how fast it arrives, how often flooding occurs, and how the property is used day to day all shape the final build. A doorway that faces a rising river needs a different assembly than a loading bay hit by fast surface runoff. Daily use matters too. A main entrance needs clear sightlines and easy access, while a service yard can accept a heavier frame.
Supply this data to your supplier before design starts:
- Entrance dimensions, including width, height, and sill level
- Flood depth, intensity, and frequency at the property
- How water reaches the site and how fast it rises
- Daily traffic patterns and access needs
Freestanding walls span nearly any length and follow the building contour. Perimeter-surround designs wrap the whole property. Both options suit sites where water can arrive from more than one direction. Share photos and a site plan with the supplier. Accurate input keeps the glass flood wall specifications aligned with real conditions.
Anchoring And Installation Support
Anchoring depends on the substrate. Concrete, masonry, and steel each call for a different fixing method. Confirm the anchor type and embedment depth against the certified design before work begins. A perimeter-surround layout needs anchors along its full run, so check that every fixing point lands on sound material.
Ask what installation support the supplier provides. Certified drawings, an anchor layout, and on-site guidance reduce the risk of a poor fit. Confirm who inspects the finished wall and who signs off on the seal. Clear support terms protect the warranty and keep the barrier ready for the next flood.
Cost And Value Review
Comparing Quotes Beyond Price
Two quotes for the same opening can differ by a wide margin. Price alone will not tell you which wall protects the property. Line up the glass flood wall specifications side by side before you judge either number. Check the glass thickness, the frame alloy, the anchor design, and the certified load rating. A lower quote often reflects a thinner panel or a lighter frame. That saving may cost far more during a flood.
Ask each glass flood wall supplier to price the same scope. State your flood depth, entrance dimensions, and site conditions in the request. A quote built on vague input hides cost in later changes. Confirm what each price includes: certified drawings, anchors, seals, installation support, and documentation. Compare the rated flood depth on each sheet. A wall rated below your site depth is not a cheaper option. It is a different, weaker product.
Lifecycle And Inspection Costs
Purchase price is one part of the total cost. A well-designed barrier provides full-time permanent defense with no operational costs. No pumps, no power, no staff time to deploy it. Weigh that against systems that need activation before every flood event. Labor and equipment add up over the years, and each deployment carries a risk of error.
Plan for inspection and seal replacement. Seals age faster than glass, so budget for periodic replacement across the barrier’s design life. Confirm the inspection interval the supplier recommends. Check the cost and lead time for spare seals, gaskets, and anchors.
A wall with hard-to-source parts becomes expensive to keep ready. Ask whether the warranty depends on documented inspections. Keep a log of each check, and note any damaged seals, missing hardware, corrosion, or deformation. These records support warranty claims and reveal wear trends early. A modest inspection budget protects a much larger investment.
Conclusion
Five checks decide your purchase. Structural details cover glass type, thickness, frame, anchors, and seals. Performance ratings prove watertightness, hydrostatic load, impact, and wind resistance. Compliance confirms the test standards and certificates behind each claim. Site data matches the design to your flood depth and daily use. Cost review compares quotes on equal scope and plans for seal replacement.
Request certificates and test documentation in writing. Confirm the inspection interval for damaged seals, missing hardware, corrosion, and deformation. Then build a specification checklist and use it during every supplier evaluation. A written checklist turns a confusing stack of quotes into a clear, comparable decision.
FAQ
What is the first glass flood wall specification to verify?
Check the structural load rating first. Ask for the third-party certificate that proves it. This number shows whether the wall holds back water at your stated depth. No other feature matters if the rating fails.
Does a thicker glass panel always mean a stronger wall?
No. The frame, anchors, and seals share the load. A thick panel with a weak seal still leaks. Confirm the watertightness rating for the complete assembly, and match the glass thickness to the certified design.
Which certificate should buyers request from a supplier?
Request a current certificate from an accredited laboratory. It must name the tested assembly: glass thickness, frame profile, and anchor spacing. An in-house test summary is a starting point, not proof. Get copies in writing before signing.
How often do glass flood wall seals need replacement?
Seals age faster than glass, so plan for periodic replacement across the design life. Confirm the inspection interval the supplier recommends. Keep a log of each check for damaged seals, missing hardware, corrosion, and deformation. These records support warranty claims.
Can a glass flood wall protect a property without staff or pumps?
Yes. A well-designed barrier provides full-time permanent defense with no operational costs. No pumps to run and no gates to deploy. The wall stands ready. Budget only for periodic inspection and seal replacement.