Protecting your home from water damage starts with proper Flood Barrier Installation. With extreme weather events on the rise, knowing how to install effective barriers can save you from costly repairs and stress. This step-by-step guide breaks down the process into simple, practical actions, helping you safeguard your property efficiently and confidently while preparing for potential flooding risks.

Importance of Flood Protection
Protecting Your Home
Flood protection is essential for every homeowner. Floods can happen quickly, especially during storms or when rising water levels threaten neighborhoods. Taking steps to secure your home helps keep your family safe and reduces the risk of flood damage.
Many homes are vulnerable to water entering through doors, windows, and garages. Flood protection measures block these entry points and keep water outside. When you install barriers, you create a strong defense against rising water levels and protect your property.
Flood protection also helps maintain the value of your home. Water can ruin floors, walls, and furniture. By using proper installation methods, you prevent costly repairs and keep your living space safe.
Preventing Water Damage
Water damage can cause serious problems for homeowners. Floods often lead to mold growth, electrical hazards, and structural issues. Flood protection reduces these risks and keeps your home safe.
Proper installation of flood protection tools is important. If you do not install barriers correctly, water may seep through gaps and cause damage. Always follow instructions and check for leaks after setting up your flood protection system.
Here are some risks of improper installation:
- Water entering through unsealed edges.
- Weak barriers collapsing under pressure.
- Safety hazards from unstable setups.
Flood protection works best when you inspect and maintain your barriers regularly. Make sure all parts fit tightly and seal every edge. This helps prevent flood damage and keeps your home safe during storms.
Flood protection is not just about stopping water. It is about ensuring safety for everyone in your home. Proper installation gives you peace of mind and helps you respond quickly when rising water levels threaten your area.
Flood Protection Solutions
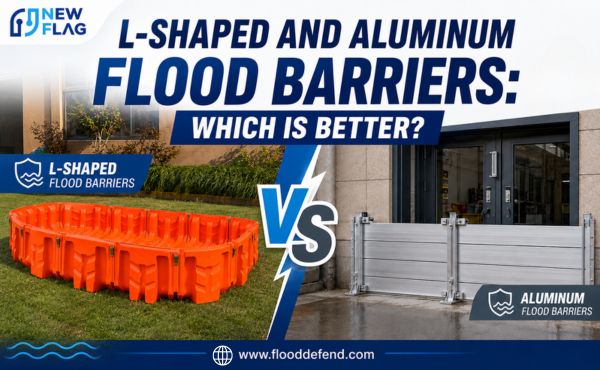
Types of Flood Barriers
Floods can cause serious damage to homes. Choosing the right barrier helps protect your property. There are several types of barriers used for flood control.
Sandbags
Sandbags are a traditional flood protection barrier. They are easy to stack and place around doors or low walls. Sandbags absorb water and create a strong barrier against rising flood levels.
Sandbags work well for temporary flood protection. They are affordable and available at many stores. Homeowners often use sandbags during emergencies.
Water-Filled Barriers
Water-filled barriers are a modern flood protection solution. These barriers use water to create a heavy and stable wall. You place the barrier where water might enter, then fill it with water to block the flood.
Water-filled barriers are reusable and easy to set up. They work well for driveways, garages, and entryways. These barriers can be emptied and stored after the flood event.
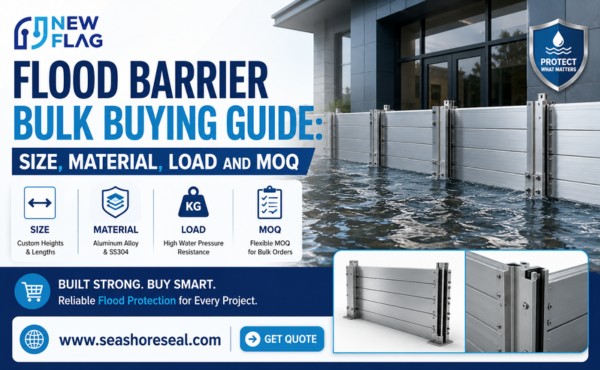
Aluminum Barriers
Aluminum barriers offer strong and durable flood protection. These barriers are lightweight and easy to install. Aluminum barriers fit tightly against doors and windows, creating a solid defense against floodwater.
Aluminum barriers resist corrosion and can be used many times. They are suitable for homes in areas with frequent floods. Homeowners can install aluminum barriers quickly when a flood warning is issued.
Opening Barriers
Opening barriers are designed for doors and windows. These barriers seal entry points and prevent water from entering. Opening barriers are adjustable and fit different sizes of openings.
Opening barriers are simple to use and provide reliable flood protection. They are ideal for homes with multiple entry points. Homeowners can remove and store these barriers when not needed.
Choosing the Right Solution
Selecting the best flood protection barrier depends on your home’s needs. Consider the location and size of entry points. Think about how often floods occur in your area.
| Barrier Type | Best Use | Reusability | Installation Difficulty |
|---|---|---|---|
| Sandbags | Temporary, small areas | No | Easy |
| Water-Filled Barriers | Driveways, garages | Yes | Easy |
| Aluminum Barriers | Doors, windows | Yes | Moderate |
| Opening Barriers | Entry points | Yes | Easy |
Flood control starts with assessing your risk. If you live in a flood-prone area, invest in durable barriers. Water barrier options like water-filled and aluminum barriers offer long-term protection.
A flood protection solution should match your budget and the level of risk. Choose barriers that are easy to install and maintain. Proper selection ensures your home stays safe during a flood.
Preparation for Flood Barrier Installation
Assessing Risk Areas
Identifying Entry Points
Start by walking around your home. Look for places where water could enter, such as doors, windows, and garage openings. Pay attention to low spots and cracks near the foundation.
Make a list of all possible entry points. This list will help you decide where to place each barrier during installation.
Evaluating Placement
After identifying entry points, decide which areas need the most protection. Focus on spots that have flooded before or are at ground level. Entryways facing slopes or driveways often need extra attention.
Draw a simple map of your home’s exterior. Mark each spot where a barrier will go. This step ensures you do not miss any important locations.
Measuring and Preparing the Area
Tools Checklist
Gather all tools and materials before starting installation. Having everything ready makes the process smoother and faster.
Here is a basic checklist:
- Tape measure
- Pencil or chalk for marking
- Cleaning supplies (broom, brush, or cloth)
- Barriers (sandbags, water-filled, aluminum, or opening types)
- Gloves for hand protection
Cleaning Surfaces
Clean the area where each barrier will sit. Remove dirt, leaves, and debris from the ground and walls. A clean surface helps the barrier form a tight seal.
Use a broom or brush to sweep away loose material. Wipe down surfaces with a damp cloth if needed. Dry the area before placing the barrier to prevent slipping.
Measure the width and height of each entry point. Mark the spots where the barrier will be installed. Double-check your measurements to ensure a snug fit.
A well-prepared area makes installation easier and more reliable. Careful preparation helps your barrier perform at its best when you need it most.

Flood Barrier Installation Steps
A successful flood barrier installation protects your home from water damage. Follow this step-by-step installation guide to ensure your barriers work effectively.
Positioning Barriers
Aligning with Openings
- Place each barrier directly in front of the entry point you want to protect.
- Make sure the bottom edge of the barrier sits flat on the ground.
- Align the sides of the barrier with the edges of the door, window, or garage opening.
Ensuring Fit
- Adjust the barrier so it fits tightly against the surface.
- Press the barrier firmly into place to reduce movement.
- Check that the barrier height matches the expected water level.
Securing and Sealing
Anchoring Methods
- Use the recommended anchoring method for your barrier type. Some barriers have built-in anchors, while others may need sandbags or weights.
- Secure the barrier to prevent it from shifting during heavy rain or rising water.
- Test the stability by gently pushing on the barrier.
Sealing Edges
- Inspect all edges where the barrier meets the ground and walls.
- Apply sealing strips or gaskets if your barrier includes them.
- Press down on all edges to ensure a watertight seal.
Testing for Leaks
Inspection
- Look closely at the entire barrier after installation.
- Check for visible gaps, loose sections, or areas where the barrier does not touch the surface.
- Fix any problems before moving to the next step.
Water Test
- Pour a small amount of water on the outside of the barrier.
- Watch for leaks or drips on the inside.
- If you see water coming through, adjust the barrier or add more sealing material.
A careful step-by-step installation process ensures your barriers provide strong protection. Always follow the instructions for your specific barrier type. Regular testing and inspection help maintain a reliable defense against water.
Troubleshooting Flood Barrier Installation
Common Mistakes
Incorrect Placement
Incorrect placement is a frequent issue during setup. Barriers must cover the entire entry point to block water. Gaps or misalignment can allow water to seep inside.
Sometimes, barriers are placed too far from the door or window. This reduces their effectiveness. Place each barrier as close as possible to the surface you want to protect.
Poor Sealing
Poor sealing can cause leaks even if the barrier is in the right spot. Edges that do not touch the ground or wall tightly may let water through. Dirt or debris under the barrier can also prevent a proper seal.
Check all edges after installation. Press down on corners and sides to ensure a tight fit. Use sealing strips or gaskets if your product includes them.
Fixing Leaks
Quick Repairs
If you notice a small leak, act quickly. Add extra sealing material to the leaking area. You can use towels or plastic sheeting as a temporary fix.
Sometimes, tightening the barrier or pressing it down again will stop the leak. Always keep extra sealing supplies nearby during heavy rain.
When to Reinstall
If leaks continue after repairs, consider reinstalling the barrier. Remove it and clean the area again. Check for uneven surfaces or debris that may have caused the problem.
Reinstall the barrier, making sure it fits tightly. Test with a small amount of water to confirm the repair worked. Repeat the process if needed until no leaks appear.
When to Get Help
Some problems may be too difficult to fix alone. If you cannot stop leaks or if the barrier will not stay in place, seek professional help. Experts can assess your setup and suggest better solutions.
If you live in an area with frequent flooding, consider a professional inspection after each installation. This ensures your home stays protected and your barriers work as intended.
Flood Protection Maintenance
Regular Inspections
Inspecting your flood protection system is important. Check all barriers after heavy rain or storms. Look for signs of wear, damage, or leaks.
Create a schedule for regular inspections. Monthly checks help you spot problems early. Use a checklist to make sure you examine every entry point.
If you notice cracks or loose parts, repair them right away. Small issues can become bigger problems if ignored. Replace damaged parts to keep your system strong.
Cleaning and Storage
Clean barriers after each use. Remove mud, leaves, and debris from surfaces. Use a brush or cloth to wipe down all parts.
Dry barriers before storing them. Moisture can cause mold or rust. Store barriers in a cool, dry place to extend their lifespan.
Organize storage so you can access barriers quickly. Stack sandbags neatly or hang aluminum barriers on hooks. Keep cleaning supplies nearby for easy maintenance.
Label storage areas for each type of barrier. This helps you find what you need during emergencies. Check storage spaces for pests or moisture regularly.
Preparing for Future Floods
Preparation is key to effective flood protection. Review your risk areas and update your map as needed. Make sure all barriers are ready for quick installation.
Create an emergency plan for your household. Assign tasks to family members and practice barrier setup. Keep tools and supplies in a designated spot.
| Preparation Step | Action Item |
|---|---|
| Review risk areas | Update entry point map |
| Check barriers | Inspect and repair |
| Organize supplies | Store tools and cleaning |
| Practice installation | Assign roles and rehearse |
Stay informed about weather alerts. Prepare barriers before storms arrive. Quick action reduces the risk of water damage and keeps your home safe.
Regular maintenance, cleaning, and preparation ensure your flood protection system works when needed. These steps help you stay ready for future challenges.
Conclusion
In summary, effective Flood Barrier Installation equips homeowners with a practical defense against costly water damage and disruption. By following clear steps, selecting suitable materials, and ensuring proper placement, you can significantly reduce flood risks and enhance property resilience. Investing time in correct installation not only protects your home but also provides long-term peace of mind—making it an essential measure for any flood-prone area.