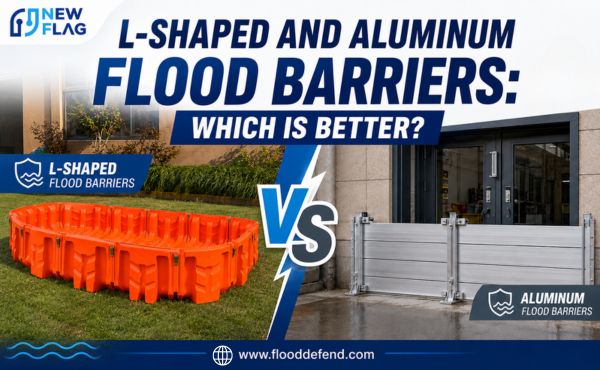
Protecting your property from flood damage is essential. L-shaped flood barriers offer strong defense because they use a unique anchoring design and lightweight panels. These barriers stop flood water from entering homes and buildings fast.

How L-Shaped Flood Barriers Work
Key Features and Benefits
L-shaped flood barriers use a smart design to block water. The base sits flat on the ground, while the upright panel faces the direction of the flood. This shape helps the barrier stay in place when water pushes against it.
These barriers are lightweight, with each panel weighing about 3.5 kg. One person can carry and set them up without help. The panels connect tightly, which stops water from leaking through gaps.
L-shaped barriers resist rust and damage from outdoor weather. They last for many years with proper care. The panels are easy to clean and store after use.
Where to Use L-Shaped Barriers
L-shaped flood barriers work best in areas where water enters buildings. Place them at doorways, garage entrances, and basement windows. They also protect driveways and walkways that often flood.
You can use these barriers for homes, shops, and small offices. They fit well in places with limited space. The panels can be set up quickly when a flood warning comes.
L-shaped barriers give fast protection during sudden storms. They help prevent costly flood damage. Many people choose them because they are simple to use and move.
5-Step Flood Barrier Installation Guide
Assess and Prepare Area
Start the 5-step guide by checking your property for possible flood entry points. Focus on ground-level doors, windows, and any area that has flooded before. Walk around your building and look for cracks or gaps where water might enter during a storm.
Preparation is key for effective flood barrier installation. Remove leaves, dirt, and debris from the ground. A clean surface helps the flood barriers seal tightly and improves flood protection.
Check the weather forecast for the season. Install flood barriers before heavy rain or storm warnings. Early preparation increases your property’s protection and reduces emergency stress.
Gather Tools and Materials
Collect all tools and materials before starting installation. You will need L-shaped flood barriers, sealing strips, and basic hand tools like a wrench or screwdriver. Having everything ready speeds up the process and ensures proper flood protection.
Each panel weighs about 3.5 kg. The lightweight design allows for easy handling and quick deployment, even for one person. Make sure you have enough panels to cover all entry points.
Check that all parts are in good condition. Damaged panels or missing seals can reduce the effectiveness of your flood barrier installation. Replace any worn items before the season begins.
Position and Align Barriers
Place each flood barrier at the marked entry points. Align the base flat on the ground and make sure the upright panel faces the direction of incoming water. Proper alignment is essential for strong flood protection.
Connect the panels tightly to prevent gaps. Overlapping edges help stop water from seeping through. Take your time with this step to ensure the best results.
If you need to adjust the position, lift and move the lightweight panels as needed. This flexibility helps you respond quickly during a storm or emergency.
Secure and Seal Barriers
Begin securing and sealing the flood barriers by following the trusted manufacturer’s instructions. Use the anchoring system to lock each panel in place. Tighten all fasteners to prevent movement during high water.
Apply sealing strips along the edges for extra flood protection. Press down firmly to create a watertight seal. This step is critical for stopping water from entering your property.
Inspect the entire line of barriers. Make sure every panel is stable and sealed. This careful preparation gives you peace of mind during the storm season.
Test and Adjust
Test your flood barrier installation before the next storm. Pour a small amount of water along the base to check for leaks. Watch for any signs of seepage or movement.
If you find leaks, adjust the panels or add more sealing strips. Repeat the test until you achieve a tight seal. This step confirms your flood barriers are ready for emergency deployment.
Practice installing and removing the barriers at least once each season. This keeps your skills sharp and ensures fast action when a flood warning comes.
Troubleshooting Flood Barrier Installation
Fixing Misalignment
Misalignment can reduce the effectiveness of flood barriers. If panels do not line up, water from a storm may seep through gaps. Start by checking each panel after you place it at the entry point.
Use your hands to gently shift the panels until the bases sit flat on the ground. Make sure the upright parts of the flood barriers face the direction of the flood. If you see uneven gaps, lift the lightweight panels and reposition them.
Check the connection points between panels. Overlapping edges should fit tightly. If you notice movement during a test, repeat the alignment process until the flood barriers feel stable.
Sealing Issues
A poor seal can let flood water pass through, even if the barriers are in place. Inspect the sealing strips before every storm. Look for cracks, dirt, or worn spots that could weaken the seal.
Clean the area under the flood barriers with a brush or cloth. Remove all debris before you attach the sealing strips. Press each strip down firmly to create a watertight seal.
If you find leaks during a test, add extra sealing strips or replace damaged ones. Always check the entire line of flood barriers for weak spots. Regular maintenance helps keep your property safe from flood damage.

Flood Barriers Maintenance
Inspection Schedule
Regular inspection of flood barriers is important for reliable flood protection. Check each barrier before the rainy season begins. Look for cracks, loose parts, or worn sealing strips.
Inspect the flood barriers after every major storm. Water pressure and debris can cause damage that reduces protection. Make sure each barrier sits flat and connects tightly to block water.
A good inspection schedule helps you spot problems early. Early repairs keep your flood protection strong all season. This routine protects your property from unexpected water damage.
Cleaning and Storage
Clean flood barriers after each use. Remove mud, leaves, and other debris with a brush and water. Dry each barrier completely before storing to prevent mold and rust.
Store flood barriers in a dry, cool place during the off-season. Stack panels neatly to save space and avoid bending. Keep sealing strips and tools together for fast flood protection setup.
Check stored barriers at least once each season. Look for signs of damage or wear. Clean and repair as needed to keep your flood protection ready for the next storm.
Proper cleaning and storage extend the life of your flood barriers. Well-maintained barriers give you peace of mind and strong protection every season.
Conclusion
L-shaped flood barriers provide a fast, reliable, and user-friendly solution for protecting properties from sudden flooding. Their lightweight design, strong anchoring system, and tight panel connections make installation quick while ensuring effective water resistance across key entry points. When properly positioned, sealed, and maintained, they deliver long-term durability and dependable performance in emergencies. This step-by-step approach highlights their practical value in reducing flood risks and protecting assets efficiently. Overall, L-shaped flood barriers are a smart, essential defense for modern flood protection strategies.