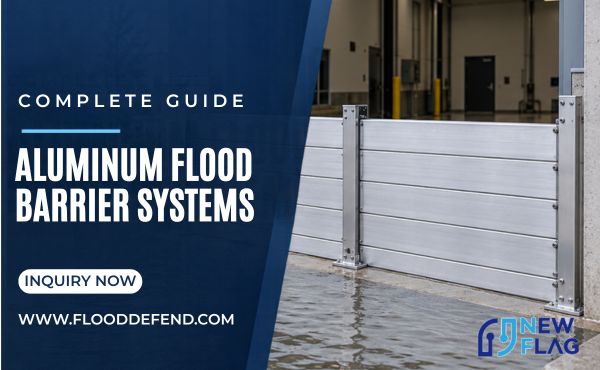
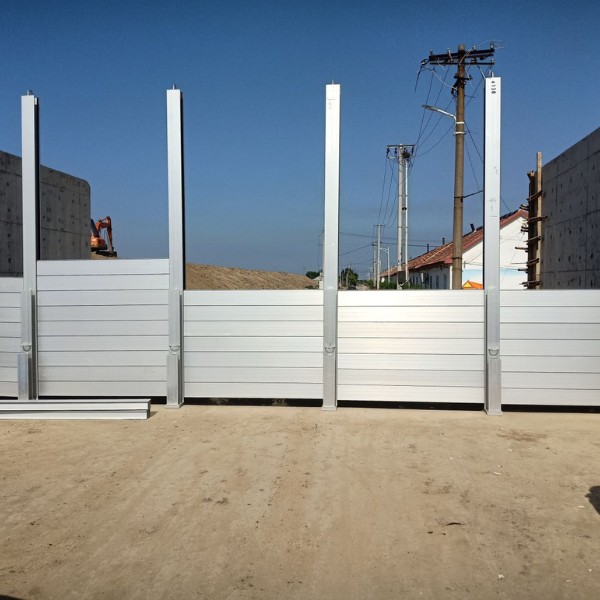
Installing aluminum flood barriers involves two different operations: permanent mounting and emergency deployment. During permanent mounting, installers fix the side channels and, for wider openings, the center-post bases to the building structure. Before floods, operators insert the removable panels, install any center posts, and activate the compression mechanisms that press the seals against the surrounding surfaces.
The exact anchor type, hole depth, spacing, seal compression, and allowable installation tolerance depend on the selected barrier system and the supporting structure. Always follow the approved project drawings and manufacturer’s installation manual. The following process explains the main requirements for typical side-mounted, demountable aluminum flood barriers.
Before Installing Aluminum Flood Barriers
Check the openings and surrounding structures before drilling any holes. Aluminum flood barrier systems can only perform as designed when the mounting surfaces, seals, channels, and fasteners work together.
Confirm the following site information:
- Clear opening width measured at the top, middle, and bottom
- Required flood protection height and expected water-facing side
- Wall, column, and floor materials
- Condition and flatness of the sill or finished floor
- Presence of skirting, door frames, pipes, conduits, or other obstructions
- Space available above the opening for inserting stacked panels
- Location of removable center posts for wide or multi-bay openings
- Drainage paths and any joints or cracks that could allow water to bypass the flood barriers
Do not assume that every masonry wall is suitable for direct anchoring. Hollow blocks, weak brickwork, cladding, insulation, and damaged concrete may require structural reinforcement or a different mounting arrangement. A qualified project engineer should confirm the substrate and anchoring method when site conditions are uncertain.
Components and Tools Required
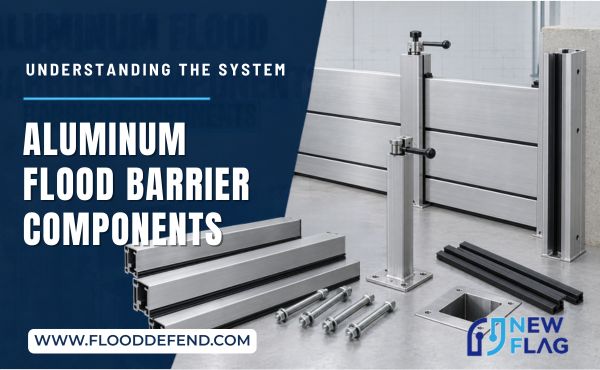
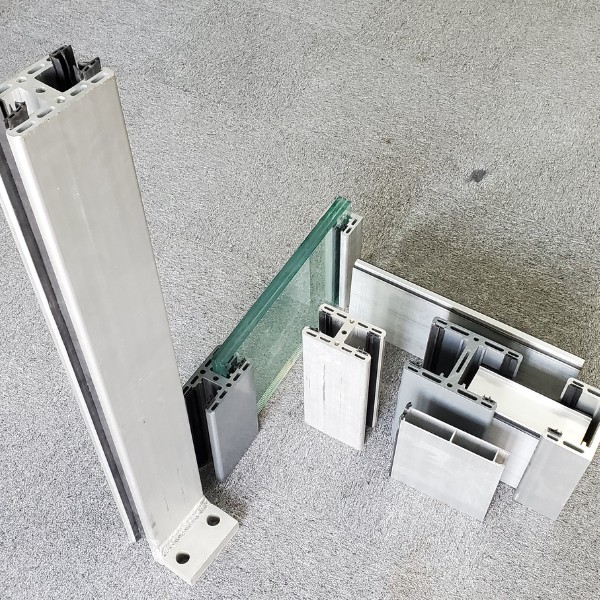
The delivered components vary according to the opening width and barrier configuration. Check the packing list and assembly drawing before installation.
| Component or tool | Main purpose |
|---|---|
| Side channels | Support both ends of the aluminum panels |
| Aluminum barrier panels | Stack horizontally to form the required protection height |
| Removable center posts | Divide wide openings into manageable spans when required |
| Compression devices | Apply controlled pressure to the panels and seals |
| EPDM or specified seals | Reduce leakage at panel joints, side channels, and the sill |
| Approved anchors and fasteners | Secure permanent components to the structure |
| Compatible sealant | Close gaps behind mounting profiles and around penetrations |
| Tape measure and level | Check dimensions, channel alignment, and sill condition |
| Drill and suitable bits | Prepare fixing holes for the selected substrate |
| Torque-controlled tools | Tighten fasteners according to project requirements |
Use only the anchors, fasteners, sealants, and tightening values specified for the project. Substituting components without approval can change the load capacity or sealing performance of the installation.
How to Install Aluminum Flood Barriers
1. Measure and Inspect the Opening
Measure the clear width at several heights because walls are not always parallel. Record the finished floor level, required barrier height, mounting surfaces, and water direction. Compare the measurements with the approved fabrication drawing before unpacking or modifying any profiles.
Remove loose material, dust, oil, old sealant, and protrusions from the contact areas. Repair major cracks, spalled concrete, or uneven surfaces before installing the channels. If the sill is sloped or irregular, confirm the permitted tolerance and any required leveling treatment with the flood barrier supplier.
2. Mark the Side-Channel Positions
Position both side channels according to the drawing, with their open sides facing each other. Check that the profiles are vertical, correctly oriented toward the flood side, and aligned across the opening.
Mark the fixing holes through the profiles or installation template. Before drilling, check for concealed electrical cables, pipes, reinforcement, or other services. Measure the distance between the channels at the top and bottom. Incorrect spacing can make the panels difficult to insert or prevent even seal compression.
3. Drill and Prepare the Fixing Holes
Drill the holes using equipment suitable for the wall or column material. Keep the drill perpendicular to the mounting surface and follow the diameter and embedment depth stated in the approved anchor specification.
Remove drilling dust from the holes. For chemical anchors, observe the manufacturer’s instructions for hole cleaning, curing time, installation temperature, and edge distance. Do not load or tighten uncured anchors.
4. Seal and Fix the Side Channels
Apply the specified sealant continuously behind each channel before positioning it against the structure. This rear seal is important because water can otherwise travel through small gaps between the metal profile and the wall.
Install the fasteners loosely at first. Recheck that each channel is vertical and that both channels remain parallel. Tighten the fasteners in a balanced sequence according to the project requirements. Remove excess sealant without interrupting the sealed joint, then seal around fixing penetrations where specified.
5. Install Center-Post Bases When Required
Wide openings may use removable center posts to divide flood barriers into separate bays. Position each embedded or surface-mounted base exactly as shown on the layout drawing. Misaligned bases can prevent the posts from standing vertically or cause unequal loading between adjacent panels.
Before final tightening or grouting, temporarily fit the center posts and confirm their relationship with the side channels. Keep the sockets or bases clean and install any supplied cover plates when the flood barriers are not deployed.
6. Check and Clean All Sealing Surfaces
Inspect the side channels, sill, panel edges, and center-post grooves. Remove stones, screws, packaging, hardened sealant, and other debris. Even small objects beneath the bottom seal can create a continuous leakage path.
Check the seals for cuts, permanent deformation, detachment, or twisting. Do not use sharp tools to force seals into position. Replace damaged sealing parts with compatible components before testing the flood barriers.
7. Install the Posts and Aluminum Panels
Fit removable center posts first when the system includes them. Insert the lowest aluminum panel in the orientation shown in the assembly drawing. Lower it carefully into the side channels or between a channel and a center post without cutting or rolling the seals.
Continue stacking the remaining panels in the specified order. Make sure every panel sits evenly on the one below it and that the horizontal seals remain continuous across the opening. Do not drop panels into the channels, as impact can damage panel ends, seals, or mounting components.
8. Engage the Compression Mechanisms
Install the top compression beams, clamps, hand screws, or other locking devices supplied with the flood barriers. Apply pressure gradually and evenly across all bays. The purpose is to seat the panels and compress the seals as designed—not to tighten every mechanism as far as possible.
Uneven or excessive tightening may distort components and shorten seal life. Follow the specified sequence, tightening value, or visual compression indicator provided for the product. After tightening, check that panels remain level and that no seal has been pushed out of position.
Post-Installation Inspection and Water Testing
First perform a visual and mechanical inspection. Confirm that all permanent fixings are secure, the channels are parallel, removable components fit correctly, and compression devices operate without binding.
A controlled water test can then help identify installation defects, subject to site safety rules and the approved test method. Apply water from the designated flood side and observe the bottom seal, channel-to-wall joints, panel joints, center-post areas, and fixing penetrations. Record the test conditions and any leakage locations.
The test acceptance criteria should come from the project specifications or flood barrier manufacturer. Avoid describing removable flood barriers as “completely waterproof” unless the selected systems have been tested and rated for the stated conditions. Minor seepage and uncontrolled leakage are not the same; performance must be judged against the applicable product documentation.
Common Installation Problems and Corrective Actions
| Problem | Possible cause | Corrective action |
|---|---|---|
| Water appears beneath the bottom panel | Debris, an uneven sill, or a damaged bottom seal | Clean the sill, inspect the seal, and verify the permitted surface tolerance |
| Leakage occurs beside a channel | Discontinuous rear sealant or poor wall contact | Inspect and reseal the channel-to-wall interface as specified |
| Panels are difficult to insert | Channels are not parallel or panel seals are twisted | Recheck channel spacing and correctly seat the seals |
| A gap remains between panels | Debris or damaged horizontal seals | Remove the panels, clean the joint, and replace damaged seals |
| Compression differs across the opening | Uneven tightening or a misaligned center post | Reset the panels and apply compression in the approved sequence |
| Fasteners become loose | Unsuitable substrate, anchor selection, or installation | Stop using the flood barriers and have the anchoring conditions reviewed |
Do not conceal recurring leakage with additional surface sealant before identifying its source. The problem may result from alignment, damaged seals, structural movement, or an unsuitable mounting surface.
How to Deploy Flood Barriers Before Floods
Permanent channels reduce deployment work, but the removable components still need a documented emergency procedure. Assign trained personnel and store all barrier parts close enough to the protected opening for rapid access.
Before expected flooding, clean the channels and sill, inspect the seals, install center posts, insert the panels in order, and activate the compression devices. Complete a final walk-around from both sides of the opening. Confirm that water cannot simply bypass the flood barriers through adjacent doors, drains, wall penetrations, or lower sections of the building envelope.
Keep the protected side clear and do not stand in moving or rising floodwater to adjust a barrier. Flood response must follow the site’s safety and evacuation plan.
Removal, Storage, and Maintenance
Remove the flood barriers only after local conditions are safe and retained water pressure has been relieved. Release the compression devices gradually, lift out the panels, and remove center posts according to the operating manual.
Wash away mud, sand, salt, and chemical residues using cleaning methods compatible with the aluminum finish and seals. Allow the components to dry before storage. Store panels on suitable supports where their edges and gaskets will not be crushed, cut, or permanently deformed.
Inspect the channels, anchors, posts, compression mechanisms, and seals at planned intervals and before the flood season. Carry out a practice deployment so personnel know the component order and any problems are discovered before an emergency. Replace worn or damaged parts with components approved for the system.
Frequently Asked Questions
Can aluminum flood barriers be installed on brick walls?
They may be installed on suitable masonry, but the wall condition, brick type, edge distances, and anchor loads must be assessed. Weak, hollow, or damaged masonry may require reinforcement or an alternative mounting arrangement.
Do aluminum flood barriers require level floors?
The bottom seal needs continuous contact with the sill. The permitted slope, surface variation, and repair method depend on the barrier design. Measure the floor and compare it with the manufacturer’s stated tolerance rather than applying a universal value.
When are removable center posts required?
Center posts are commonly used to divide wider openings into shorter panel spans. Their number and spacing depend on the opening width, protection height, design water load, and tested system configuration.
Can building staff deploy flood barriers without installers?
Trained building staff can usually deploy removable components after the permanent channels and bases have been correctly installed. They should receive the operating instructions and complete a supervised practice deployment before flood season.
How often should flood barriers be tested?
Testing and inspection frequency should follow the site risk plan, project specification, and manufacturer’s maintenance instructions. At minimum, operators should inspect components and conduct a practice deployment before periods of elevated flood risk.
Conclusion
Reliable aluminum flood barrier installation depends on accurate measurements, suitable supporting structures, aligned channels, continuous sealing, and correctly applied compression. Installation should be verified before an emergency, while removable parts should be clearly labeled, safely stored, and included in regular deployment exercises.